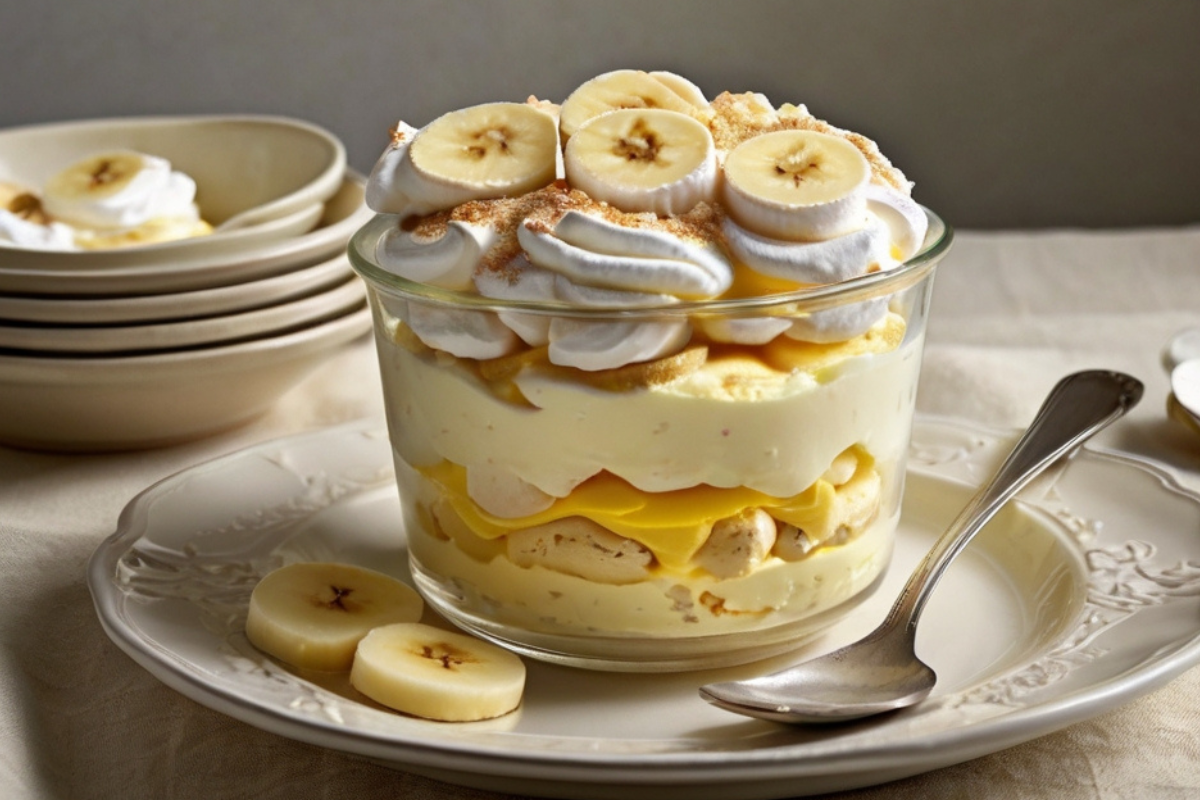
Banana pudding with vanilla wafers is a beloved dessert, particularly in the Southern United States, where it has become a staple at family gatherings, potlucks, and holiday feasts. This creamy, layered dessert combines the sweet, rich flavor of bananas with the delicate crunch of vanilla wafers, all enveloped in a luscious pudding. Preparing this dish is simple, but there are many ways to elevate it to new heights, ensuring it delights everyone who tastes it.
The Origins of Banana Pudding
Banana pudding has a history as rich as its flavor. This dessert likely emerged in the Southern United States during the late 19th century, a period when bananas were becoming more readily available due to improved transportation methods. The original recipes were simple, often using just a custard or pudding made from scratch, along with bananas and a biscuit or sponge cake as the base.
The introduction of vanilla wafers by Nabisco in the early 20th century marked a turning point for this dessert. The crispy, sweet wafers provided the perfect contrast to the creamy pudding and soft bananas, making them an essential ingredient in the modern banana pudding recipe. Today, banana pudding with vanilla wafers is as much a part of Southern culinary tradition as pecan pie or sweet tea.
To delve deeper into the historical context of this classic dish, visit the History of Southern Food.
Essential Ingredients for Making Banana Pudding
Making banana pudding is a straightforward process, but the key to a perfect pudding lies in the quality of your ingredients and the care you take in preparation. Here’s a breakdown of what you’ll need:
- Bananas: Choose bananas that are ripe but still firm. Overripe bananas can become mushy and may overpower the other flavors in the dessert. The bananas should be sweet and aromatic, but still hold their shape when sliced.
- Vanilla Wafers: Nilla Wafers are the classic choice for banana pudding, offering a light and crisp texture that softens slightly as the pudding sets. However, you can experiment with other cookies, such as butter cookies, graham crackers, or even shortbread for a different texture and flavor.
- Pudding: The traditional recipe calls for vanilla pudding, which can be made from an instant mix or from scratch. Instant pudding is a convenient option, but homemade pudding allows for more control over the flavor and consistency. Vanilla pudding is the standard, but variations using banana, chocolate, or even lemon pudding can add an interesting twist.
- Whipped Cream: Homemade whipped cream is always preferable to store-bought versions. It adds a fresh, airy quality to the dessert that complements the rich pudding. If you’re short on time, however, a good quality store-bought whipped cream will do the job.
- Additional Ingredients: While the core ingredients are sufficient for a classic banana pudding, you can also include extras like cream cheese for added richness, or a drizzle of caramel or chocolate sauce for a decadent touch. For those interested in making the pudding a bit healthier, consider using reduced-fat wafers, sugar-free pudding mix, and skim milk.
For more insights into why fresh bananas are essential for desserts, refer to this Healthline article.
Step-by-Step Guide to Making Banana Pudding
1. Preparing the Pudding
The first step in making banana pudding is to prepare the pudding itself. If you’re using an instant pudding mix, follow the package instructions carefully. Typically, this involves mixing the powder with cold milk and whisking until the pudding thickens. Allow the pudding to sit for a few minutes to ensure it sets properly.
If you’re making the pudding from scratch, you’ll need a few more ingredients and steps:
- In a saucepan, combine sugar, cornstarch, and salt. Gradually whisk in milk and cook over medium heat until the mixture thickens and begins to boil.
- Once thickened, remove from heat and stir in butter and vanilla extract for added flavor.
- Allow the pudding to cool slightly before layering.
The Science of Cooking offers a detailed explanation of how to achieve the perfect creamy texture in homemade puddings.
2. Assembling the Banana Pudding
Assembling the banana pudding is a simple but crucial step. The layers are what give the dessert its distinctive look and delightful combination of textures.
- Layer 1: Vanilla Wafers – Begin by placing a layer of vanilla wafers at the bottom of your serving dish. You can use a large trifle dish, a 9×13-inch baking dish, or individual dessert cups. The wafers should cover the entire bottom, but there’s no need to overlap them too much.
- Layer 2: Bananas – Next, slice your bananas into thin rounds and layer them over the wafers. The bananas should be evenly distributed, covering all the wafers.
- Layer 3: Pudding – Spoon a generous layer of pudding over the bananas, spreading it out to cover them completely. The pudding should be thick enough to hold the layers together, but not so thick that it’s difficult to spread.
- Repeat – Continue layering wafers, bananas, and pudding until you’ve used up all your ingredients. Aim for at least three layers, finishing with a layer of pudding on top.
- Final Touch – For a finishing touch, spread whipped cream over the top layer of pudding. You can also sprinkle crushed wafers or garnish with additional banana slices to make the presentation more appealing.
3. Chilling and Serving
Once assembled, cover the dish with plastic wrap and refrigerate for at least 4 hours, or overnight. This chilling time is crucial, as it allows the flavors to meld together and the wafers to soften slightly, creating a harmonious blend of textures.
Before serving, check that the pudding has set properly. The top should be firm, and the layers should hold together when you scoop out servings. Garnish with extra whipped cream and a sprinkling of wafer crumbs or banana slices for an added touch of elegance.
Exploring Variations of Banana Pudding
While the traditional banana pudding is a classic, there are countless ways to put your own spin on this dessert. Here are some variations to consider:
- Flavor Variations: Experiment with different pudding flavors to add a new dimension to your banana pudding. Banana pudding mix will intensify the banana flavor, while chocolate pudding adds a rich, decadent layer. For a lighter, more refreshing version, try lemon pudding paired with a lemon drizzle on top.
- Alternative Ingredients: If you can’t find vanilla wafers or simply want to try something different, consider using butter cookies, graham crackers, or shortbread cookies as a base. Each offers a unique texture and flavor profile that can change the overall taste of the dish.
- Healthy Options: For those looking to reduce calories or fat, you can make a healthier version of banana pudding by using sugar-free pudding mix, skim milk, and fat-free whipped cream. You can also substitute reduced-fat wafers or even make your own lighter biscuits to use in the layers.
- Elegant Presentation: Serve your banana pudding in individual jars or dessert cups for a more refined presentation. This not only looks elegant but also makes it easier to serve at gatherings.
- Extra Toppings: Beyond the traditional whipped cream and wafer crumbs, consider adding a drizzle of caramel or chocolate sauce, a sprinkle of toasted coconut, or even a handful of chocolate chips for added indulgence.
Tips for Storing and Serving Banana Pudding
Banana pudding is best enjoyed fresh, but if you need to prepare it ahead of time or store leftovers, here are some tips to ensure it stays delicious:
- Refrigeration: Always store banana pudding in the refrigerator, covered with plastic wrap or in an airtight container. The dessert should be kept cold until ready to serve to maintain its freshness and prevent the bananas from browning.
- Avoiding Sogginess: The vanilla wafers will naturally soften as they absorb moisture from the pudding. To prevent them from becoming too soggy, serve the pudding within 24 hours of assembly. If you’re making the pudding in advance, consider waiting to add the final layer of wafers and whipped cream until just before serving.
- Freezing Banana Pudding: Freezing is not recommended for banana pudding, as it can alter the texture of both the pudding and the bananas. The bananas may become mushy, and the pudding may lose its creamy consistency when thawed.
Frequently Asked Questions about Banana Pudding
Can I make banana pudding ahead of time? Yes, banana pudding can be made up to 2 days in advance. In fact, many believe that letting the pudding sit for a day enhances the flavor, as it gives the wafers time to soften and the flavors to meld together.
How do I prevent the bananas from turning brown in my banana pudding? To prevent the bananas from browning, slice them just before layering and consider tossing them in a small amount of citrus juice, such as lemon or orange juice. The acid in the juice helps slow down the oxidation process, which causes browning.
Why is my banana pudding watery? Watery pudding usually occurs if the pudding hasn’t set properly before layering. Make sure to allow the pudding to chill and thicken in the refrigerator before assembling the dessert. Also, ensure that the pudding is not exposed to warm temperatures for extended periods, which can cause it to separate and become watery.
Is it necessary to refrigerate banana pudding? Yes, banana pudding should always be refrigerated. The pudding contains dairy, and storing itstoring it at room temperature can cause it to spoil, particularly the dairy components like the pudding and whipped cream. Keep it chilled until you’re ready to serve to ensure both safety and the best flavor.
Can banana pudding be frozen? No, freezing banana pudding is generally not recommended. Freezing can significantly alter the texture, making the pudding watery and the bananas mushy. It’s best to prepare and store banana pudding in the refrigerator for up to 3 days.
What can I use if I don’t have vanilla wafers? If you don’t have vanilla wafers, you can substitute them with other crispy cookies like graham crackers, shortbread, butter cookies, or even digestive biscuits. Each of these alternatives will offer a different flavor and texture, allowing you to customize the dessert to your liking.
Conclusion
Banana pudding with vanilla wafers is more than just a dessert; it’s a beloved tradition that brings warmth and comfort to any gathering. Whether you stick to the classic recipe or experiment with variations, the key to a great banana pudding lies in the quality of your ingredients and the care you take in preparation.
From selecting the perfect bananas to layering the ingredients just right, every step contributes to the final product: a sweet, creamy, and satisfying treat that’s sure to be a hit. So the next time you’re looking for a dessert that’s both easy to make and universally loved, look no further than banana pudding with vanilla wafers. Enjoy the process, savor the results, and don’t be surprised if this dish becomes a regular feature on your dessert table!

